
Intego X6 Getting Started Manual
- Installing Intego Software
- Serializing Intego Software
- Uninstalling Intego Software
- Using Intego NetUpdate
- Intego NetUpdate Preferences
- Using Intego Widgets
- Technical Support
This Intego Getting Started Manual provides information that is common to all Intego X6 programs. No matter which Intego software you are using, this manual provides valuable information for installing and working with your software. It covers three areas:
- Installing Intego Software: This manual explains how to install Intego software, whether you have purchased it by download, or on a CD or DVD.
- Using Intego NetUpdate: Intego NetUpdate is a program used by other Intego programs to check for updates to the programs and their support files. This manual explains how to work with NetUpdate to ensure that your Intego software is always up-to-date.
- Using Intego Widgets: Intego software installs Dashboard widgets, and this manual describes the general widgets that are applicable to all Intego programs.
Installing Intego Software
There are two ways to install Intego software, depending on which program(s) you purchased, and how you purchased them:
- The first procedure covers VirusBarrier X6 purchased by download from the Intego web site. (See Installing VirusBarrier X6.)
- The second procedure covers any Intego software purchased on a CD or DVD, as well as any version of the Intego Security Barrier suites purchased on CD or DVD, or by download. (See Installing Internet Security Barrier or Installing from a CD or DVD.)
- Finally, if you install any Intego Dual Protection software, the programs you install on your Mac use one of the above procedures, and the programs you install on your Windows installation use a Windows installer. (See Installing Dual Protection Software.)
You will need to enter an administrator's password to install your Intego software on your Mac.
Installing VirusBarrier X6
If you purchased VirusBarrier X6 from the Intego website, you will have downloaded a disk image file containing that program's installer. Locate the disk image file that you downloaded.
Double-click the disk image file to mount the disk image; it will display on your Desktop and/or in the Finder window sidebar. Double-click the installer icon, which will look like this:
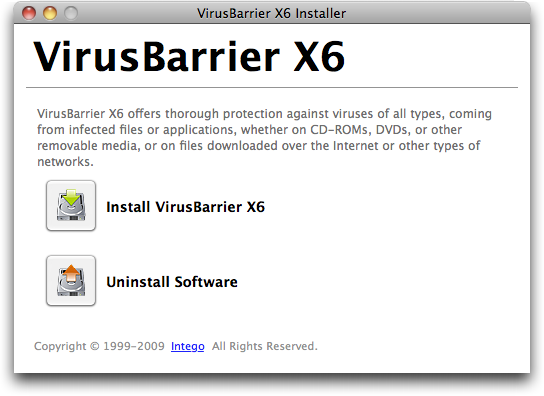
A window will display, offering you the options to Install or Uninstall your Intego software: click Install.
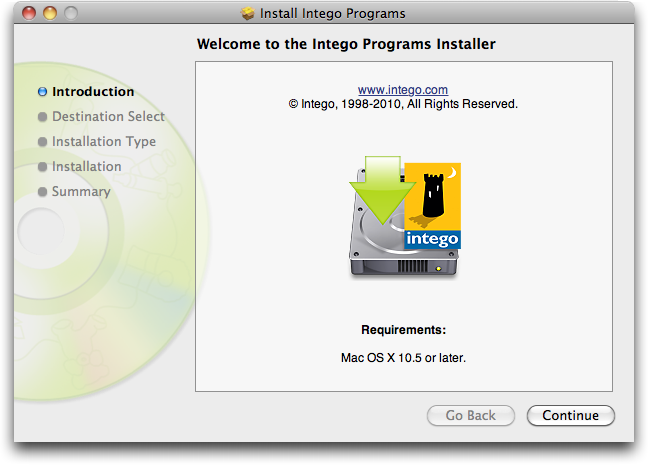
The installer will launch:
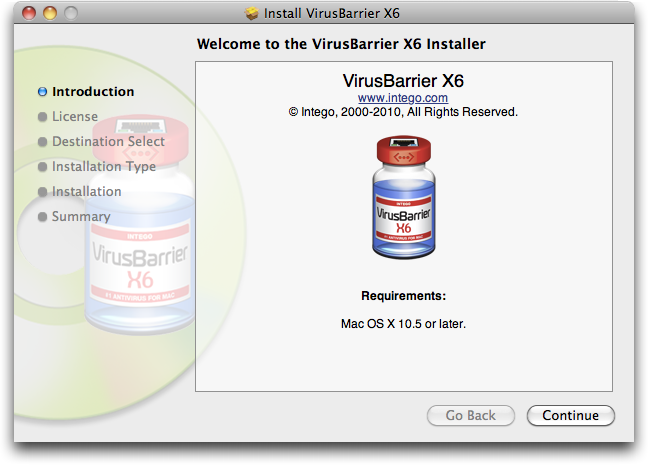
Click Continue to proceed with installation. The Intego software license displays. Click Continue, then click Agree if you accept this license; if not, click Disagree, and the installer will quit.
A window will display presenting Intego's User Experience Improvement Program. This program allows Intego software to collect information about how you use certain features, in order to help improve the quality and reliability of the software. This information is collected anonymously, and cannot personally identify you or your behavior. If you accept this, click Continue to go to the next window; if not, uncheck Allow anonymous information to be collected, then click Continue.
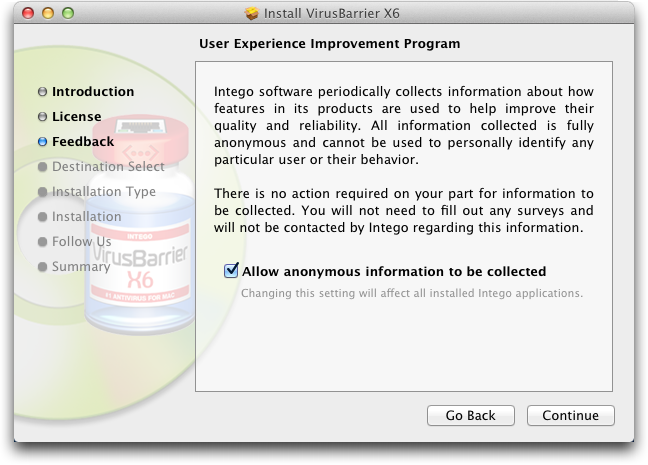
(You can activate or deactivate this information collection at any time from within each Intego program. Each program's Preferences window contains a Feedback icon. Click on this icon to change this information collection.)
The next window shows all the available disks or volumes on your computer. Select the disk or volume where you want to install your Intego software, then click Continue.
Click Install to install your Intego software. If you have already installed other Intego software, this button will show Upgrade, because some components common to all Intego programs will already be present on your hard disk.
After installation, you will have to restart your computer.
Installing Internet Security Barrier or Installing VirusBarrier X6 from a DVD
If you purchase VirusBarrier X6 on a DVD, or Intego Security Barrier either by download or on a DVD, you will have a multi-program installer. Locate the disk image file that you downloaded, or insert the DVD in your computer.
If you have a disk image, double-click the disk image file to mount the disk image; it will display on your Desktop and/or in the Finder window sidebar. If you have a DVD, open that disk. Double-click the folder corresponding to the language version that you want to install, then double-click the installer icon, which will look like this:
Double-click the Intego Installer icon. This installer lets you install all Intego software on your computer. If, however, you don't have a serial number for certain programs, they will install as demo versions that you can use for thirty days. A window will open advising you of this. Click OK.
You will see an icon for each program available. To select a program for installation, click its icon; if you select a program and want to deselect it, click its icon again. (Remember, you can install programs for which you do not have serial numbers if you want to try them out in evaluation mode.) A green arrow will then display on the icon of each program you have selected to install.
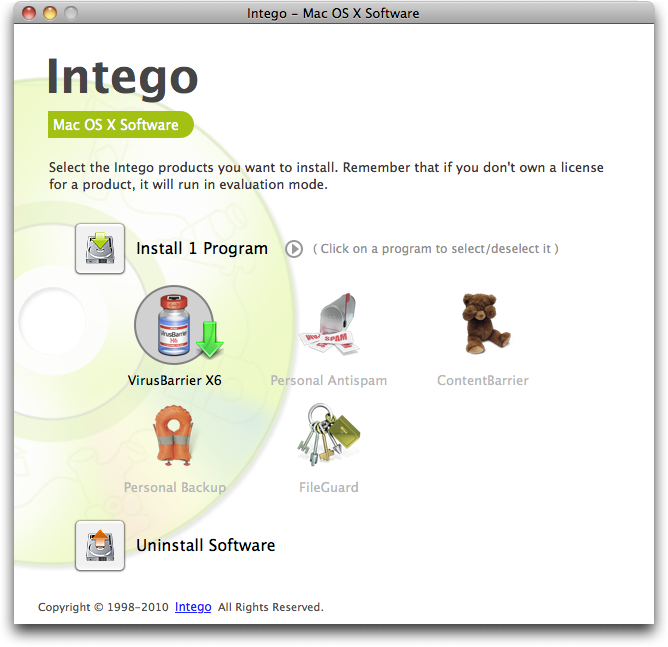
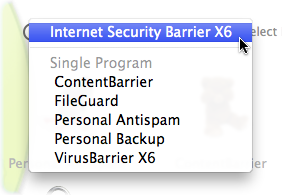
If you are installing Internet Security Barrier, click the arrow icon to the right of the Install button and choose Internet Security Barrier from the popup menu to select all the programs for installation. (You can also select single programs from this menu if you wish.)
Click the Install button. A Software License Agreement will display; you must agree to this license to continue installation. Next, the installer will ask if you want to check for the availability of newer versions of the programs you are installing. If you click Check, the installer will check with Intego's servers to see if updates are available, then install the updated versions of the programs. If you click Install Directly, the installer will install the versions of the programs it contains. You can then use NetUpdate (see later in this manual for more on NetUpdate) to check for newer versions. The installer will launch:
Click Continue to proceed with installation. The Intego software license displays. Click Continue, then click Agree if you accept this license; if not, click Disagree, and the installer will quit.
The next window shows all the available disks or volumes on your computer. Select the disk or volume where you want to install your Intego software, then click Continue.
Click Install to install your Intego software. If you have already installed other Intego software, this button will show Upgrade, because some components common to all Intego programs will already be present on your hard disk.
After installation, you will have to restart your computer.
Installing Dual Protection Software
If you have purchased one of Intego's Dual Protection software packages, that provides protection for both your Mac and your Windows installation, you will need to install the Windows software separately. Intego's Macintosh software installers do not install the Windows software programs contained in the Intego Dual Protection packages.
- Software purchased by download: If you have purchased an Intego DP software package by download, you will download one installer for your Mac software and another installer for your Windows software. To install the Windows software, either restart your Mac under Windows (if you are using Apple Boot Camp) or launch your emulation or virtualization software (if you are using Parallels Desktop or VMware Fusion). Copy the Windows installer to your Windows installation, then decompress the installer by double-clicking it. Launch the installer and follow the instructions. Full installation instructions are available in the program's manual.
- Software purchased on DVD: If you have purchased an Intego DP software package on DVD, this disc contains both Mac and Windows software. To install the Windows software, either restart your Mac under Windows (if you are using Apple Boot Camp) or launch your emulation or virtualization software (if you are using Parallels Desktop or VMWare Fusion). Insert the DVD, then open it within Windows. Launch the installer and follow the instructions. Full installation instructions are available in the program's manual.
Serializing Intego Software
When you restart your computer, and launch the Intego software you have installed, the program will display its serialization window:
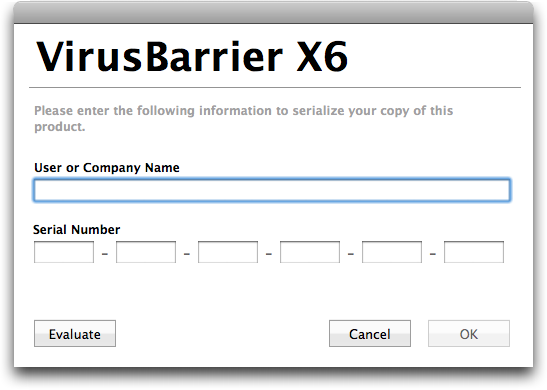
Enter your name or company, if any, and your serial number. If you purchased a boxed version, the serial number is found on a sticker inside the DVD case. If you purchased a downloadable version, your serial number was sent to you in your e-mail confirmation. When you have entered your information, click OK. The program will now open. (See the User's Manual for each program to find out how to work with the software.)
If you have purchased Internet Security Barrier, you will only have to enter your serial number once. The first Intego program you launch will ask for your serial number, which is common for all the Intego programs in the Internet Security Barrier suite. When you launch other programs, you will not need to repeat this action.
Using Intego Software in Evaluation Mode
Intego software offers an evaluation mode, to allow you to discover how the programs work before purchasing them. To use an Intego program in evaluation mode, click Evaluation Mode when the registration screen displays.
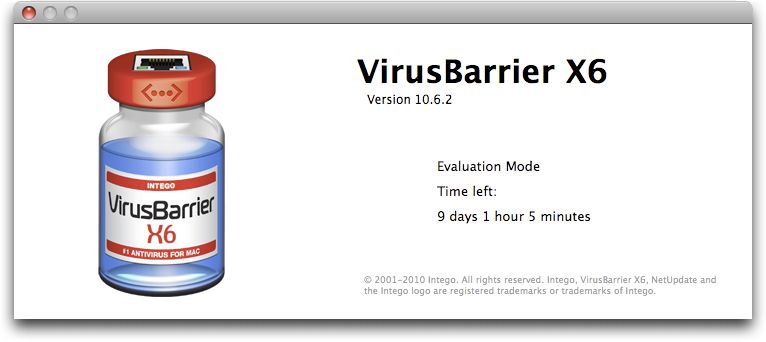
When Intego software runs in evaluation mode, it is fully-functional for 30 days. At the end of this period, you can either purchase a license for the program or uninstall it from your computer. Check the individual User's Manuals for each Intego program to find out which functions are available during this trial period.
You can find out how much time is left in your evaluation session by displaying the About screen for each Intego program. To do this, select About… from the program name menu (for example, if you are using VirusBarrier X6, select About VirusBarrier X6 from the VirusBarrier X6 menu). The About screen tells you that the program is in evaluation mode, and shows the time remaining in evaluation mode.
Uninstalling Intego Software
If you ever want to uninstall any Intego software, launch the Intego Installer, as explained above. Click the Uninstall Software button, then select the software you wish to uninstall, and click Uninstall. The software will be removed.
Deauthorizing Intego Software
Intego software comes with a license that allows you to use the software on at least two Macs (standard license), 5 Macs (family pack), or more. When you install Intego software on one of your Macs and serialize it, that Mac is considered to be authorized for one seat of your license. If you have two copies of the software installed, and wish to use it on a different Mac, you will need to deauthorize the software for one Mac and serialize it on another Mac.
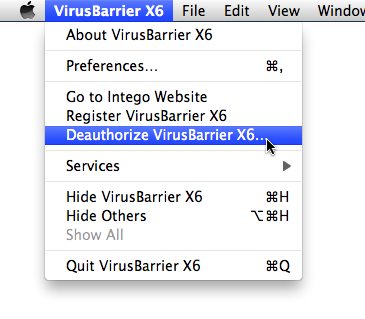
To deauthorize any Intego software, open the program, then click the program name menu and choose Deauthorize [program name]…. For example, below you can see this menu item for VirusBarrier X6.
Remember to deauthorize your Intego software if you sell one of your Macs and wish to use the software on a new Mac.
Using Intego NetUpdate
Intego NetUpdate is a program used by other Intego programs to check for updates to the programs and their support files (virus threat filters, content filters, etc.). NetUpdate is installed when you install any Intego application. It checks for updates of all Intego programs at the same time, and downloads and installs updates for all Intego programs installed on your computer.
NetUpdate can carry out automatic checks at the frequency you choose, or you can make manual checks whenever you wish.
Note: if you are using Fast User Switching on your Mac, you can only use NetUpdate for one user at a time. If NetUpdate is open under one account, and you switch users, you won't be able to open it under any other accounts. For this reason, we recommend that you quit NetUpdate whenever you switch users.
Setting up Intego NetUpdate
Intego NetUpdate is installed as an application when you install any Intego software. You can launch NetUpdate by double-clicking the NetUpdate icon in your Applications folder:

The first time you use NetUpdate, you will need to enter your e-mail address and a password in NetUpdate's preferences:
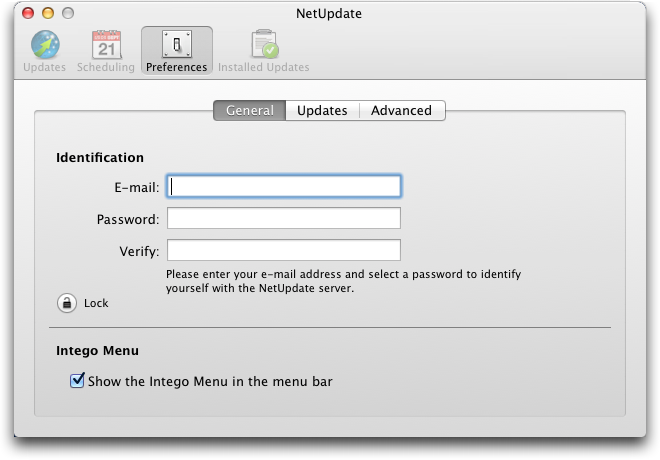
In the General tab, you enter an e-mail address and password for identification on the NetUpdate server. Enter your e-mail address in the E-mail field, then enter a password in the Password field. (This password must be from 4 to 31 characters.) Retype your password in the Confirm password field to ensure that it is correct. Keep a record of this password in a safe place.
Note: The e-mail address you use to validate NetUpdate is the same for all users on your Mac. Once this e-mail address has been validated, NetUpdate can check and install updates when any user is logged in, as long as that user has an administrator's password.
For more details about these and other preferences, see below as well as NetUpdate Preferences later in this manual.
Checking for Updates
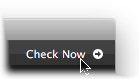
Each of Intego's programs contains a Check now… button in the NetUpdate status bar. You will see this bar at the top of the program's window; if it is not visible, choose View > Show NetUpdate Status Bar to display it. To check for updates, click the Check now… button as shown in the window below from Intego NetBarrier X5:
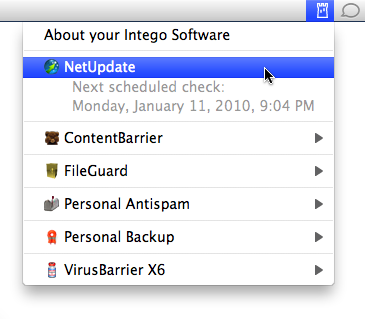
You can also open NetUpdate from the Intego menu, which is in your menu bar:
No matter how you launch NetUpdate, the program connects to Intego's server to determine whether you have the latest versions of the Intego programs, support files, and virus definitions or other filters installed on your computer. If new versions are available, you will be able to download and install them using NetUpdate.
Downloading and Installing Updates
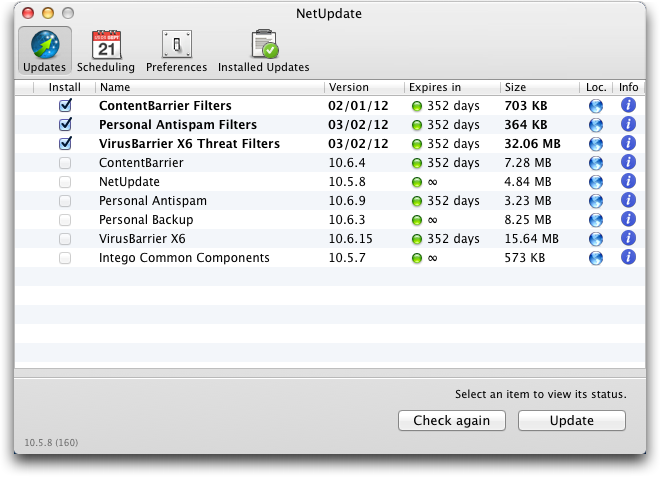
When NetUpdate connects to the Intego server it displays a list of available updates. Programs whose names are dimmed are not installed on your Mac. Programs with bold names are installed.
This list shows, for each program, the name, version, size of the update, and expiration date of your subscription (if any). Select one of the Intego programs installed on your computer by checking its check box, then click the Update button.
A dialog box displays asking you for your administrator's password; only users with administrator's privileges can download and install updates using NetUpdate.
After you enter the correct password, NetUpdate will automatically download the selected update(s) to your computer, and will install it or them as soon as the download has completed. In some cases, you may need to restart your Mac after NetUpdate has finishing installing updates.
Saving Updates
NetUpdate lets you save update files on your computer if you want to install them later, or use them to install on several computers, if you have multi-seat or site licenses. To do this, select the update you want to download by checking it in the update list, then select File > Download Item to…

Choose a location to save the file. You can then install the update by double-clicking the update file, or, if you use a local NetUpdate folder to update computers on a network, you can place the file in that folder so other computers can access it using NetUpdate. (See below, NetUpdate Preferences.)
Purchasing Intego Software
Programs that are not installed on your computer are displayed in gray. NetUpdate gives you the possibility to purchase them immediately from the Intego website. Click the name of a program displayed in gray, then click the Buy now… button at the bottom of the panel to go to the Intego website and buy the program.
Renewing Intego Software
Intego software is provided with a license (generally 12 months from the date of installation) which includes all updates and upgrades - both minor updates and major version upgrades - as well as updates to filters to maintain up-to-date protection. NetUpdate shows when your software expires. To renew your software, and benefit from another period of protection, select a program in the NetUpdate window, a Renew… button displays at the bottom of the window.
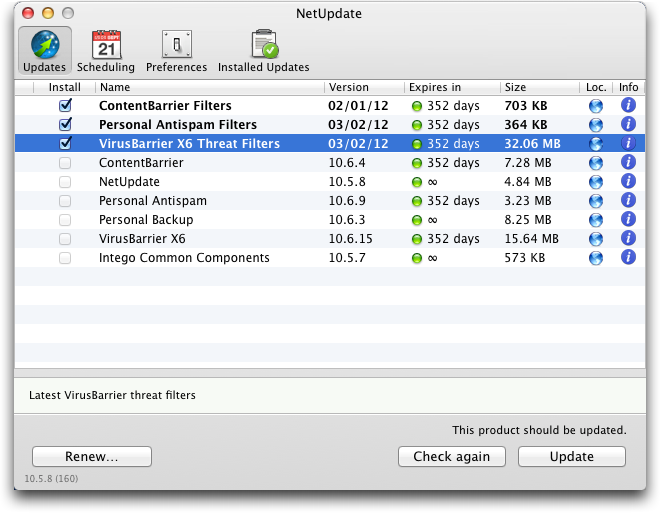
If you click the Renew… button, a page on the Intego website opens in your web browser allowing you to immediately renew your subscription to your software.
You can renew your software at any time. In fact, you should renew them before they expire, to make sure that you are fully protected, and always have the latest updates for your Intego products. NetUpdate will display a reminder 30 days before any of your software is due to expire, to ensure that you are always up-to-date.
After you renew any software, the new expiration period will only be reflected in the NetUpdate window the next time you check for updates.
NetUpdate Preferences
NetUpdate offers several configuration options. To set these options, open NetUpdate in one of the ways explained above then click the Preferences icon in the NetUpdate toolbar.
General Preferences
This tab lets you enter your e-mail address and password.

If you change e-mail addresses, you can enter a new address on this pane. If the lock is closed, you will need an administrator's password to unlock it and enter your new address.
Intego Menu Preferences
An Intego menu displays in your menu bar at all times, giving you quick access to all Intego software you have installed on your Mac, as well as to NetUpdate. By default, this menu is displayed. If you wish to turn off the display of the Intego menu, uncheck Show the Intego Menu in the menu bar.
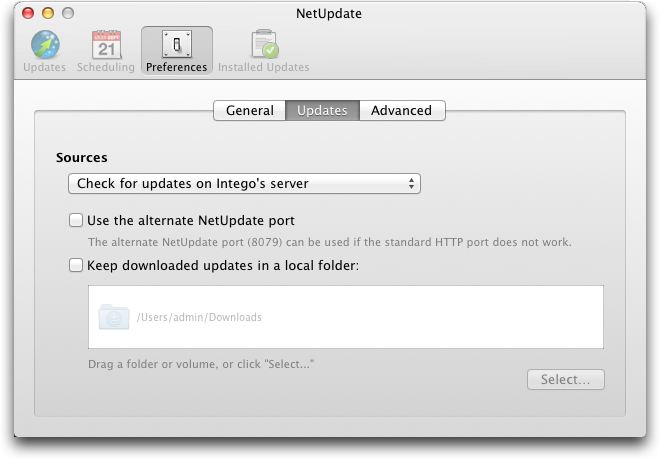
Updates Preferences
You can have NetUpdate check for new software in two locations. The default choice, Check for updates on Intego's server, should be used in most cases. With this choice, you have two options:
- Use the alternate NetUpdate port: By default, NetUpdate uses the standard HTTP port 80 to check for updates. If, for any reason, this poses problems, you can choose to use port 8079. In most cases, you won't need to change this.
- Keep downloaded updates in a local folder: This allows you to store updates locally, and is useful if you are working on a network, and have multiple user licenses for Intego products; you can then have your other Macs check for updates in that local folder anywhere on an AppleShare network. If you do this, you'll want to choose Check for updates in local or network folder from the Sources menu.
If you wish to have computers check for updates on a local network, where you have placed update packages using the above option, select Check for updates in local or network folder from the Sources menu and click the Select button to select a folder, or drag a folder to the text field. If you use a local NetUpdate folder on a remote volume, this volume must be mounted on each computer's Desktop at check time to access the NetUpdate archives. (Note: if you use an AFP volume as a local NetUpdate folder, this volume does not need to be mounted on each computer; NetUpdate can mount the volume invisibly and unmount it after checking for updates.)
To use a local NetUpdate archive folder, you can work in two ways. You can download update files to one computer then copy or move them to the NetUpdate archive folder. Or you can have NetUpdate keep downloaded updates in a local folder, as described above. You can then have other Macs use NetUpdate to check manually for updates in this folder, or you can set it to check at a regular frequency.
Note: when updating Intego software via update files located in a local NetUpdate folder, NetUpdate may need to check with the Intego server to verify the subscription rights of the program being updated. Computers updating Intego software in this manner therefore need to be able to access the Internet.
Advanced Preferences
Display options, and e-mail notification and warning options are available on this tab:
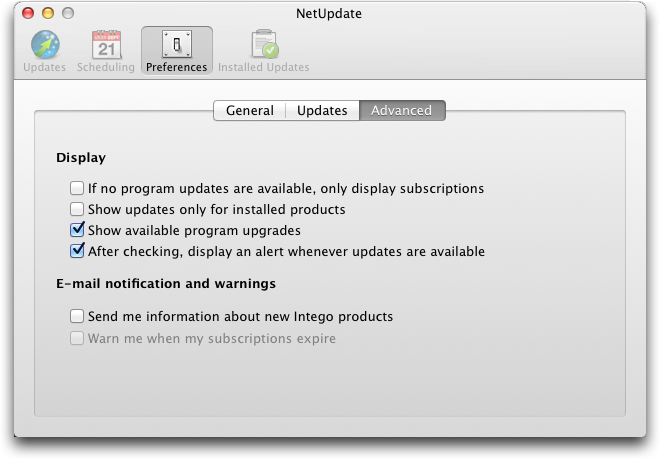
Display
- If no program updates are available, only display subscriptions: If you check this option, NetUpdate will only display updates for filters or virus definitions if no program updates are available.
- Show updates only for installed products: If this is checked, NetUpdate will only display updates for software that you have installed. If not, NetUpdate will display all available Intego updates.
- Show available program upgrades: If this is checked, NetUpdate will show any available updates to Intego software; if not, it will only show updates to filters and virus definitions.
- After checking, display an alert whenever updates are available: If this is checked, NetUpdate will display a dialog above its window when new updates are available.
E-mail Notification and Warnings
- Send me information about new Intego products: Checking this box means that you allow Intego to use the e-mail address you register to send you occasional messages presenting its new products.
- Warn me when my subscriptions expire: NetUpdate warns you when any subscriptions to filters and/or virus definitions have expired. After the first time this warning displays, you can turn off these reminders by unchecking this option.
Scheduling Preferences
You can set NetUpdate to check for new versions of your software automatically. This pane allows you to choose the frequency for these checks. It also shows the date and time of your last check and your next scheduled check.
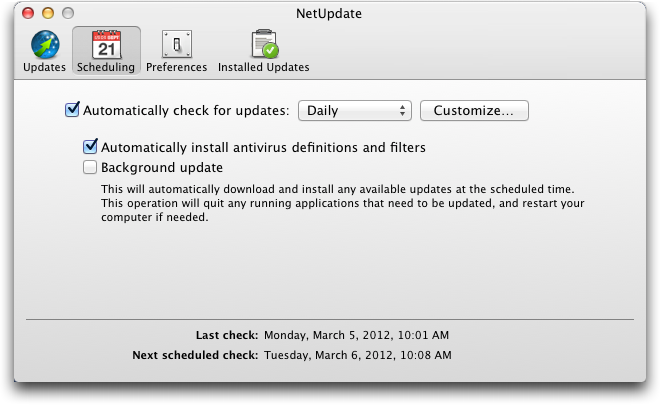
Automatically Check for updates
If you check this option, NetUpdate automatically connects to the NetUpdate server to check for updates. If you do not check this option, you can manually check for updates by clicking the Check now… button in the main display of the NetUpdate window. Choose at which frequency the updates will occur. Choose Daily, Weekly or Monthly, NetUpdate will check for new updates at this frequency.
Automatically install antirivus definitions and filters
If you check this option, NetUpdate will not alert you when it discovers new filters available for installation, but will install them immediately in the background. A small window will display when the update is completed, but you will not have to click any buttons during this process.
Background Update
If you check this option, Intego NetUpdate will attempt to update your Intego programs in the background. This will quit any programs that need to be updated, and will restart your computer if required.
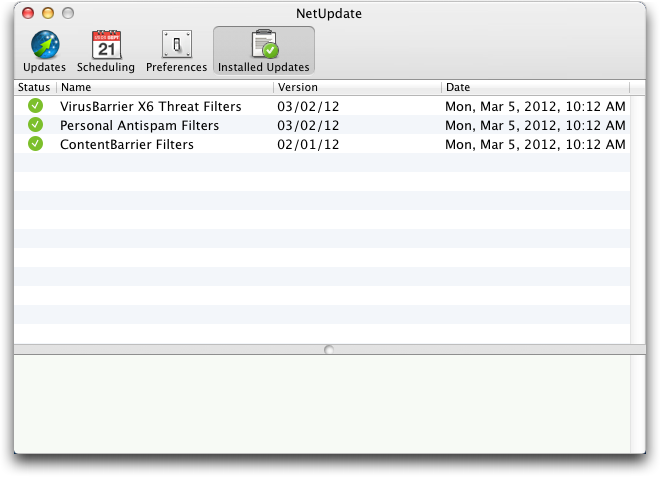
Installed Updates
This pane shows a log of the updates you have made to your Intego software. Each update that NetUpdate has made is listed here. For information on the update, click one of the entries. The version column displays version numbers for programs and dates for filters and virus definitions. If you click on the Version header, it toggles to display the Build number; click again to return the display to Version. Comments about any selected item are displayed clicked on in the bottom section of this window.
Using Intego Widgets
All Intego programs install three Dashboard widgets, which provide information about the Intego programs installed on your computer. The first widget is specific to the Intego program(s) you install; see the manuals for each program for information about their widget. The second widget, the Intego widget, gives information on all the Intego programs you have installed. It looks like this:
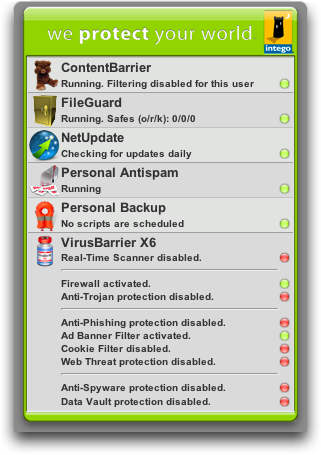
This widget shows the status of your different programs, and which features are enabled or disabled.
The third widget that Intego programs install is the NetUpdate widget, which shows the status of NetUpdate, and tells you if there are any updates available:

If you hold your mouse cursor over the widget, a letter 'i' shows in the bottom left corner. If you click on this, the widget displays the URL of the Intego web site; if you click this URL, your web browser will open at the Intego web site.

Technical Support
Technical support is available for registered purchasers of Intego products from the Intego Support page.