How to Use Automator for System Tweaks
Posted on
by
Lysa Myers
Automator has been around for quite a few versions of OS X, and yet most people are entirely unaware that it’s there. I saw it every time I went in the Applications folder and assumed it was a puzzle game about a friendly robot or something. As it turns out, it’s not a game but a very useful way to automate repetitive tasks or tweak the OS without having to know how to program.
In a way, it’s so simple it’s complicated: There are an overwhelming number of different options for things you can automate or tweak. It’s easy to stare at its huge list of actions with a mix of excitement and dread. What the heck do they all do?? How could I use them to make my life simpler and easier? I pondered going through and breaking down how it works in general, but that could easily be a book’s worth of content. It’s easy enough to Google around and see the myriad options that are out there, and poke around in the various possibilities within Automator and come to your own conclusions.
What finally sent me to Automator was trying to find a way to send a file as an attachment to email by way of Outlook rather than Apple’s Mail application. I’ll walk you through the steps I took to make this work, and hopefully it will inspire you to explore Automator to make your own tweaks.
Ready, Begin!
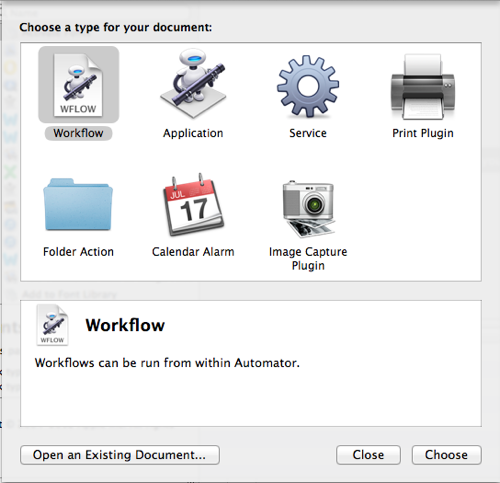
First of all, you’ll obviously need to start up Automator. You can find this in the Applications folder in Finder, or find it using Spotlight. It will ask you what type of document you’d like to create, and in this case we want to create a Service. This will mean that your final product will show up in the Services context menu in Finder.

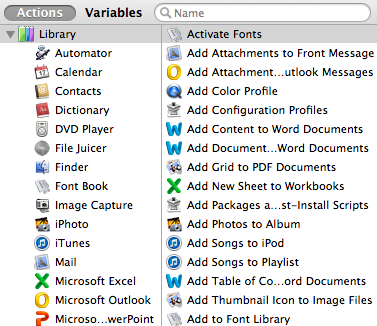
Once you begin creating your Service, you’ll need an action. You will see these over on the left-hand side of the Automator window.

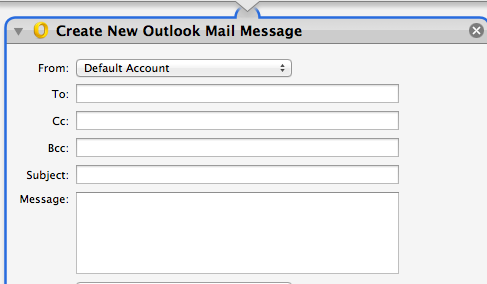
The action we’ll need to select is Create New Outlook Mail Message. You may need to scroll a bit through the middle right-hand list of actions, but if you can also filter actions by application. By selecting Microsoft Outlook, you’ll see only actions related to Outlook. Then it’ll be right up near the top, no scrolling needed. When you double-click or drag this over to the blank pane on the right, you can do some additional configuring, though it’s not necessary to add anything here.

Next, you’ll need to select an input for the action to work with. Over on the far right, near the top, you’ll see section that says, “Service receives selected.” Choose “files or folders” in “any application.”

Once you’ve finished that, you’ll need to save your service. Automator will save your new Service to: ~/Library/Services. Remember this, as it may come in handy if you mess up your first attempt and want to remove it. To remove a failed experiment, you’ll need to go to that folder in Finder (Command+Shift+G and then enter in the folder name) and delete the document you’ve created.
Now, if all has gone according to plan, you can go into Finder and right click on one or more files and they will show up a few seconds later, attached to a message in Outlook. Multiple selected files will show up in a ZIP file.
There you go! You’re on your way to automating your way to happiness.
New to Mac? Let’s get you started on the right track!